Create Your First Campaign
Let’s walk through creating your first email campaign. Follow the steps below to set it up, create your content and define who will receive the email.
Initial Setup
- Log into GreenArrow Studio, go to the
Campaignstab and clickCreate Campaign:
- Enter a
Name. This name is only used internally, so your subscribers won’t see it:
- Choose the
Mailing Listto use for the campaign:
- Choose whether you wish to use a template. Templates allow you to predefine attributes to re-use in campaigns. For example, you could define the default HTML and text bodies, Subject, and segment in a template. We’re not using a template in this example:

- Click the
Create this campaignbutton:
Define Your Content
-
Click the
Edit Contentlink that appears to the right ofSteps Required to Send: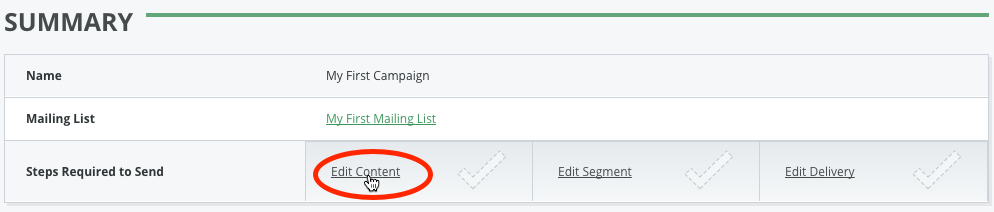
-
Click the
Addlink next toSubject not defined, as you need to define a subject before being allowed to send this campaign.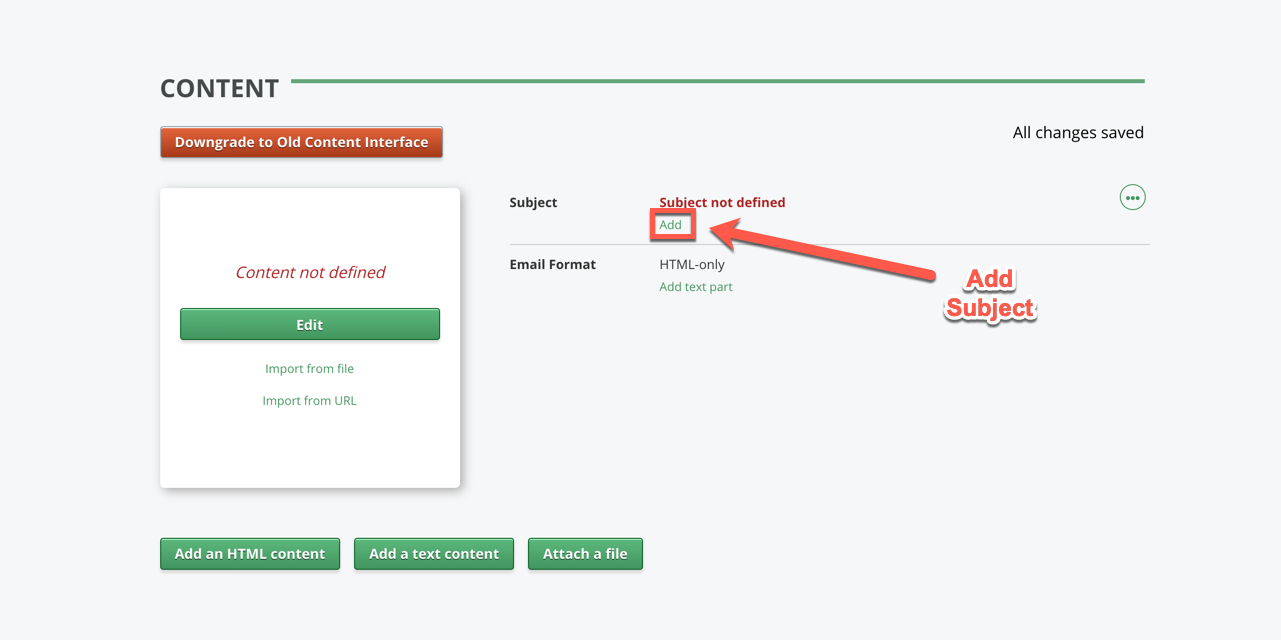
-
Add HTML or text to this content by clicking one of the buttons in the empty preview image tile. You can click
Editto begin editing the content in the BEE editor, or you can import HTML or Text using either theImport From URLorImport From filebuttons. -
Optionally, add a text version of this content, by clicking the
Add text partorEdit text partlinks. If you add a text part to the content, you cannot send the campaign until it is defined. Note theText content not definedwarning next to theEdit text partlink.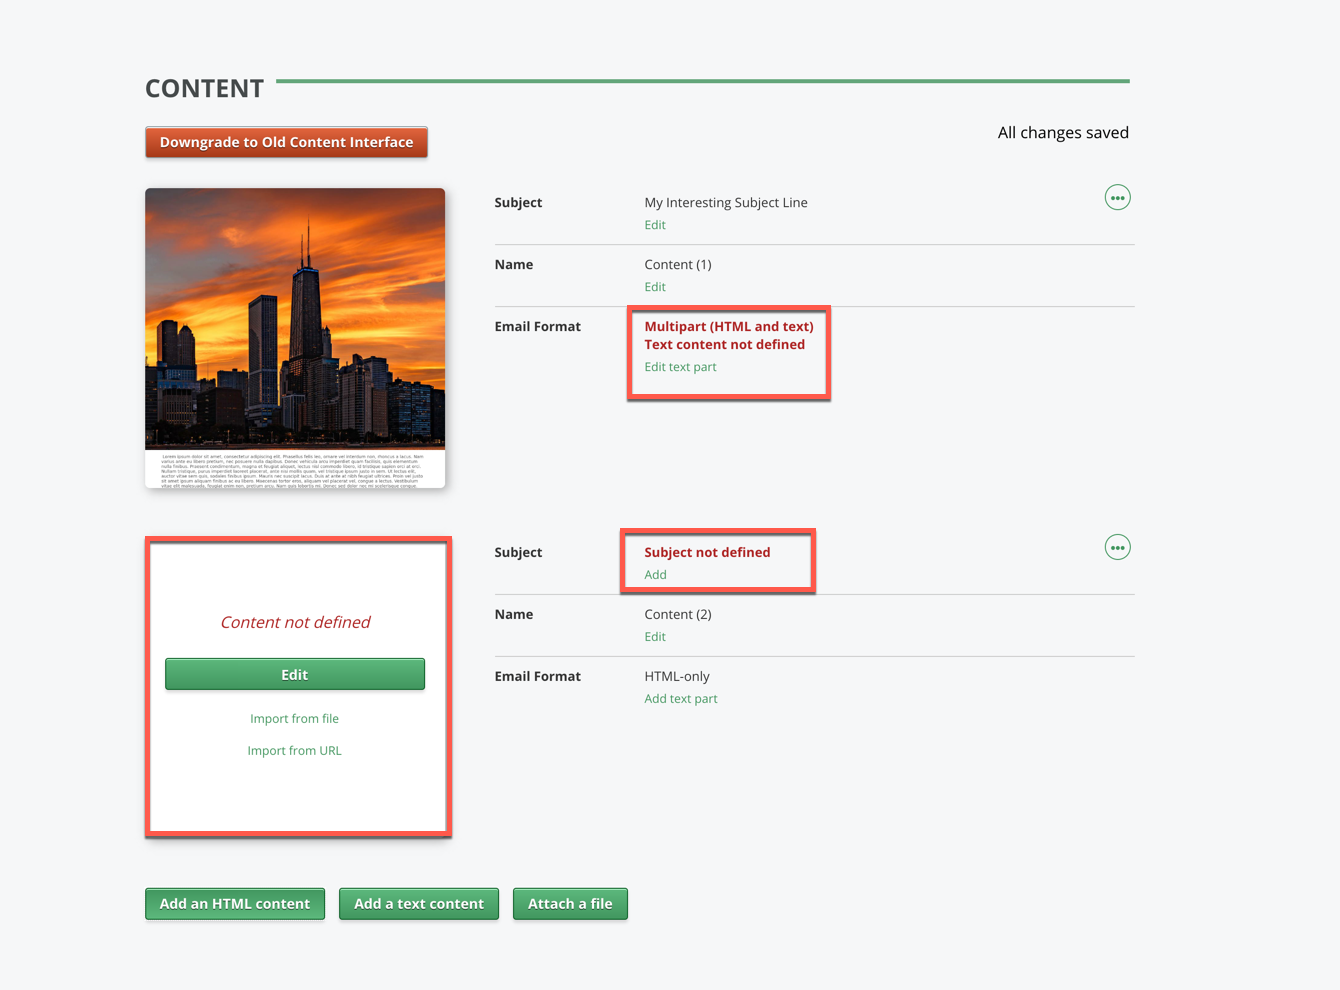
-
If you have accidentally added a text part, you can remove it by clicking the
Remove text partlink in theActionsdropdown.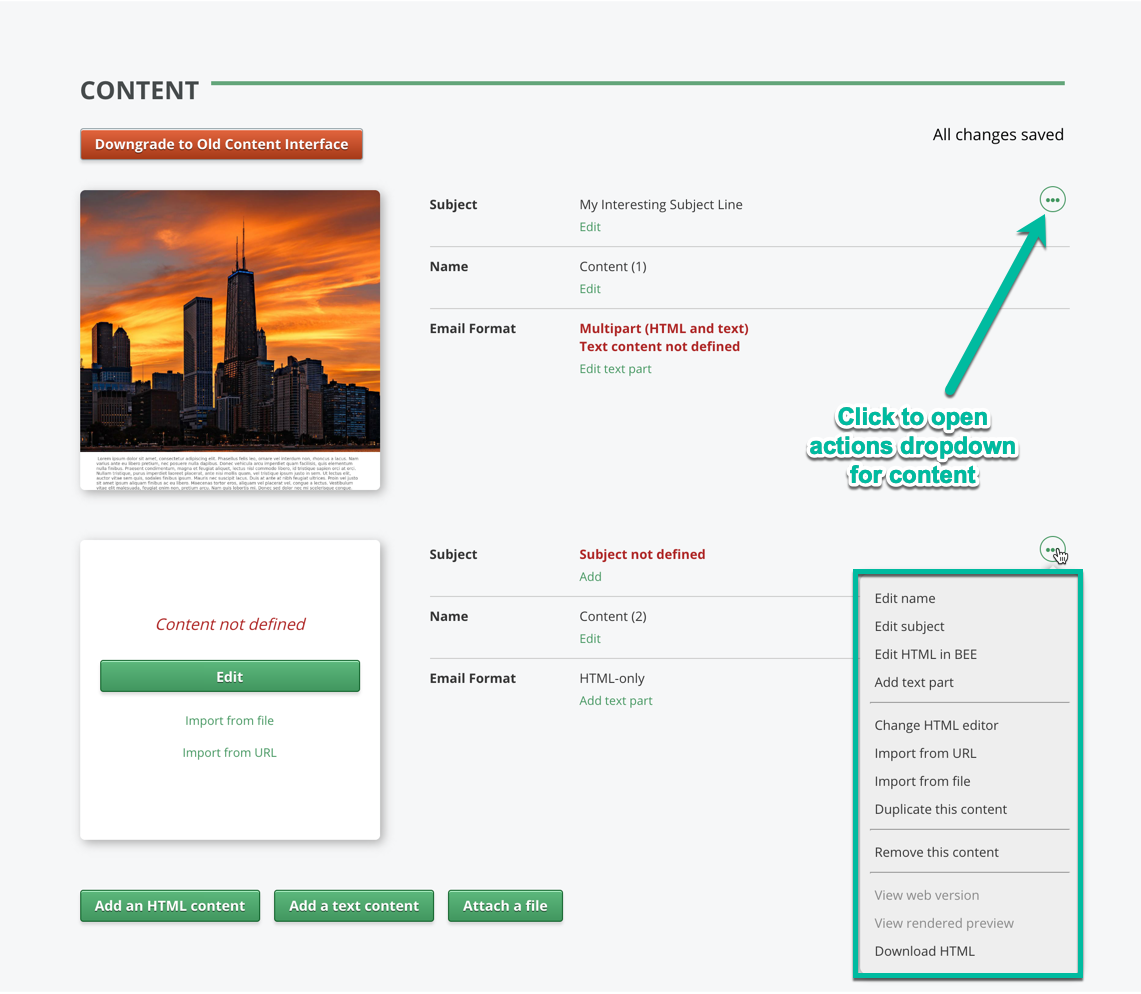
Choose Your Segment
- Click the
Edit Segmentlink that appears to the right ofSteps Required to Send: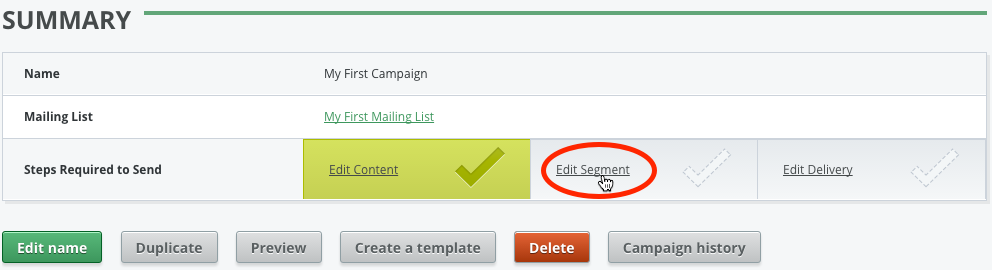
- Click
Use this segmentto accept the default segment. This will send to all recipients who have not been deactivated due to a bounce, spam complaint, unsubscribe, or other cause:
Segmentation options are outside the scope of this article. See our Segmentation Builder Basics article if you’d like to learn more about this topic.
Review Delivery Settings
- Click the
Edit Deliverylink that appears to the right ofSteps Required to Send: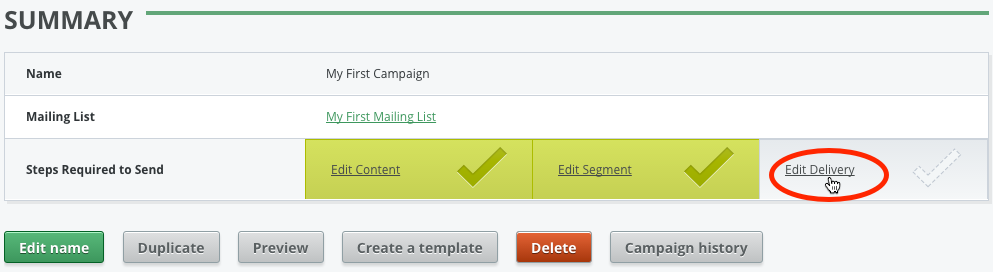
-
Many of the delivery settings that you now see had their default values defined when the mailing list was created. See our Import Your First Mailing List article if you’d like more details on those settings.
Additional fields on this page include `Track Opens` and `Track Links`. They're both on by default, but you can click `No` if you don't want to track them: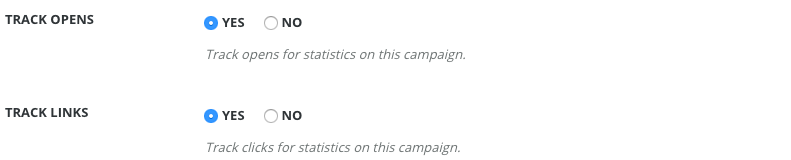
Click the `Update this campaign` button at the bottom of the page to save the delivery settings:
Preview the Campaign
Follow the steps in this section if you’d like to send a preview of your campaign:
- Click the
Previewbutton: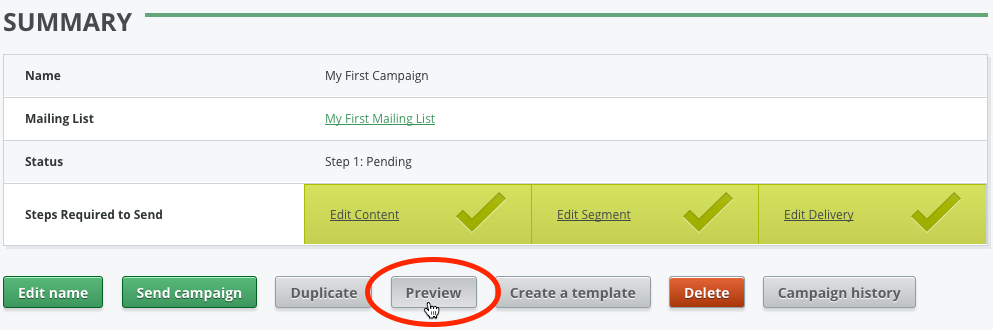
- Enter the desired
Recipients: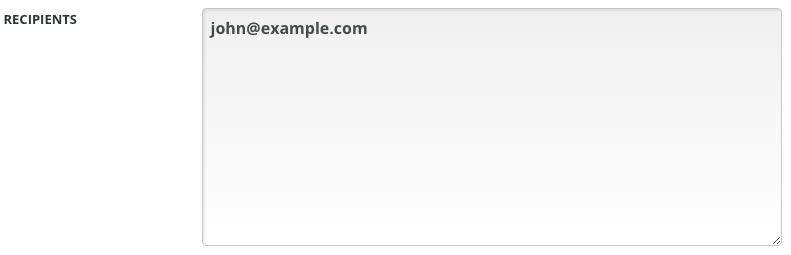
- Set
Split EmailstoYesif you’d like separate emails to be sent for the HTML and text previews. The defaultNoselection will send a single multipart email to each recipient which contains both the HTML and text versions of the campaign:
- Click
Send this preview:
Send the Campaign
- Click
Send campaign: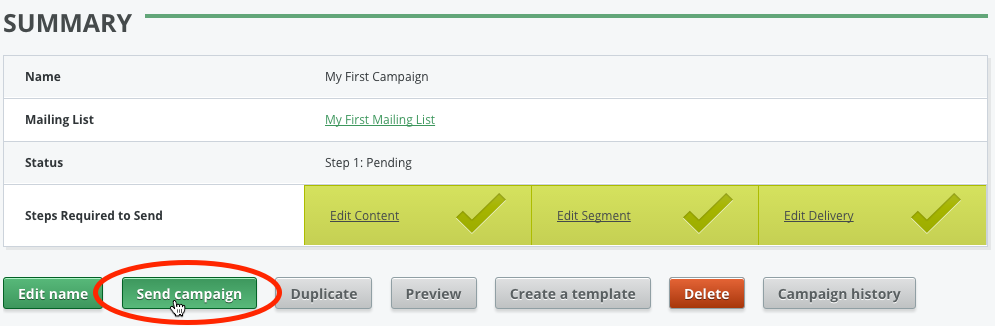
-
Next, schedule the campaign to be sent immediately or at another time:

If you're scheduling the send for later, you can enter a specific date and time or just type in a time relative to now. For example, you can enter `in 2 hours`, and GreenArrow Studio will understand what you mean, as shown by the text that was generated underneath the text field in the screenshot below:
- Click the
Schedule this campaignbutton:
- GreenArrow Studio now takes you to a confirmation page, where you can review the details of the campaign that’s about to be sent. When you’re finished with the review, click
Send this campaign:
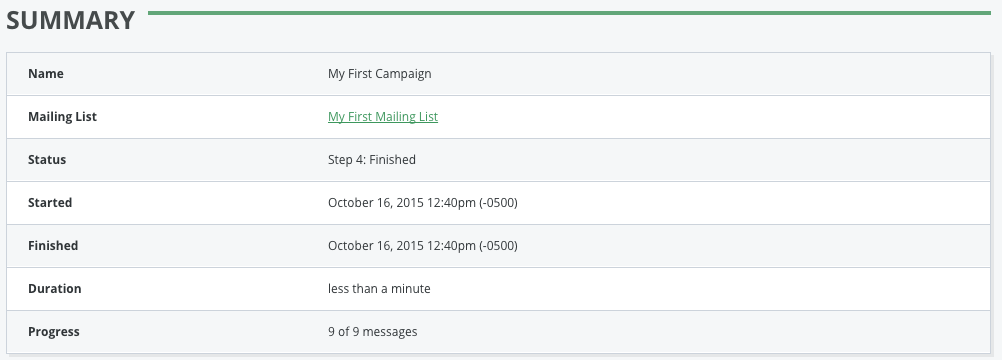
- The campaign is now scheduled, and will automatically start sending at the time that you specified. GreenArrow Studio will redirect you to the campaign’s home page, where you can see the status of the campaign:
Congratulations! You just created and sent your first GreenArrow Studio campaign!