
What is DKIM? An Intro, Check-up & List of Benefits
Digital signatures are everywhere.
Gone are the medieval days of quill pens and wax seals (unless you’re a Game Of Thrones fan!) Nowadays we rely on a variety of digital solutions to verify our identity. We use services like DocuSign to sign online contracts. We look for SSL certificates when we make online purchases from trusted vendors, and supply them with the CVV code on our credit card. And when it comes to email, we use DKIM to verify our identity as a sender. In this post, I’ll give you an introduction to what DKIM is, how to check for it, and the list of advantages it provides your business. Let’s get cracking!
What is DKIM, and Why Should I Use it?
DKIM (DomainKeys Identified Mail) is a protocol that allows email senders to digitally “sign” their emails before sending them out. Recipient ISPs (like Gmail, AOL, and Yahoo) can use each DKIM signature to verify an email was sent by the domain name shown in the signature (the signing domain). The signing domain could be your domain name, or some other domain, like one owned by your email service provider. More on that later.
DKIM signatures are examined by recipient ISPs (like Gmail, AOL, and Yahoo) to verify that they’re not forged. Interestingly, the domain name that’s used to perform DKIM signing may or may not match up with the From address domain – more on that later.
DKIM does not prevent someone from forging an email as if it came from you, but it does put an “authentic” or “genuine” stamp on the email that you do sign. (To prevent forgery you need something called DMARC, which builds on top of DKIM’s “authentic” stamp.)
If you’re like most businesses, signing with DKIM is essential for three reasons:
- If you’re a reputable sender, DKIM attaches a part of your reputation to each email you send.
- Some spam filters are more likely to send DKIM-signed emails to the Inbox.
- You have to DKIM sign your emails to use Yahoo’s feedback loop, which can improve and protect your email delivery to Yahoo.
DKIM signing might even impact other aspects of your sending, such as click-through rates. One of our customers recently made a mistake that resulted in emails not being DKIM-signed at all for about a day. This led to a noticeable difference in the engagement data. On the day when DKIM signing was not taking place, the click-through rate dropped dramatically—from 5.3% to 3.0%. That’s a 43% decrease! Once DKIM signing was put back into place, the click-through rate went back up to 4.7%.
To be fair, there may have been other variables at play here. But even if DKIM was only responsible for a fraction of that difference in click-through rates, it’s still worth getting right.
Bottom line: If your DKIM signature isn’t up to snuff, you’re hurting your email delivery and may even be decreasing your engagement. So how can you tell if you’re correctly signing your emails?
Need A Checkup? Gmail to The Rescue!
Fortunately, Gmail makes it easy to test whether you’re signing your emails in a way that meets Google’s standards. Let’s run a quick report that we’ll use as the basis of our DKIM checkup. Four steps make it easy.
- Send an email message (from the email system you want to perform the DKIM checkup) to your Gmail account.
- Sign into Gmail’s web interface.
- View the message that you just sent to yourself.
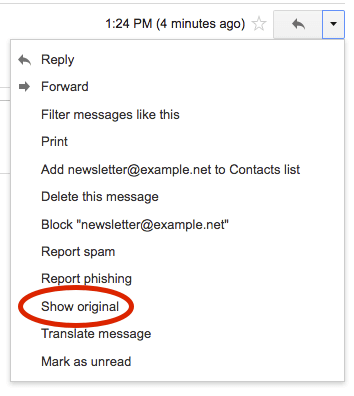
- Click on the down arrow that appears towards the top right of your message, then “Show original”:
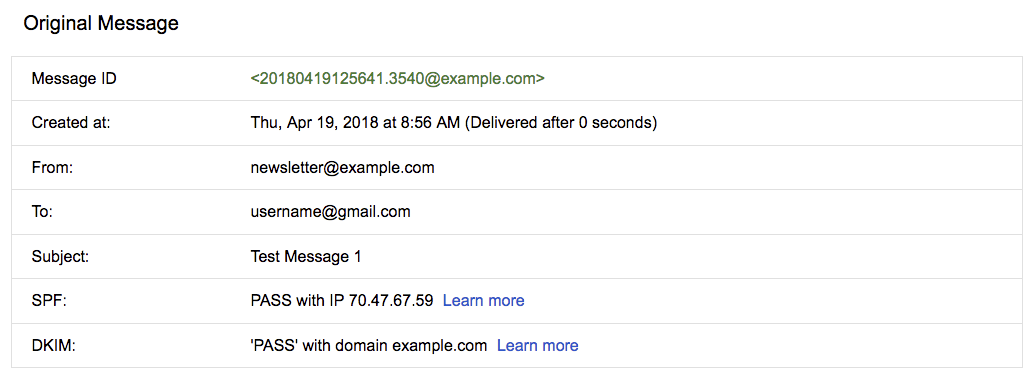
Now take a quick look at the “DKIM” section of the report:
- If it shows “PASS,” then congrats! You’ve met Gmail’s DKIM signing requirements.
- If it shows “FAIL,” then your message was DKIM signed, but something’s wrong. Check the “Addressing DKIM Failure” section below.
- If the DKIM section is missing entirely, then your email wasn’t DKIM signed at all.
Who Signed On The Bottom Line?
Our example report (above) shows that DKIM passed “with domain example.com.” As you probably guessed, “example.com” is the domain name that was used to perform DKIM signing.
The domain name that signs your email may be:
- Your domain name, such as mycompany.com or email.mycompany.com.
- A domain name belonging to your ESP, such as drh.net. (Sometimes this domain name is an acronym and numbers like gasv1.com)
Signing with your ESP’s domain name simplifies the setup of your account, and is what many ESPs do by default. But if you’re a large email sender and investing in your email delivery is critical for your business, then we recommend signing with your domain name, which has four significant advantages:
- Reputation: It allows you to develop a positive reputation as a good sender on your domain, rather than letting your ESP take all the credit. And this positive reputation can protect or improve your email delivery.
- Transferable: If you decide to change ESPs in the future, the positive reputation you’ve built up as a good sender is transferable.
- Branding: In some email clients, an email signed with only the ESP’s domain shows that the email was either (a) sent “on behalf of” your company by your ESPs domain or (b) “via” your ESP’s domain name. For branding reasons, you may want to remove that reference.
- Invaluable Data: It allows you to use Google Postmaster Tools, which provides invaluable data for improving and protecting your email delivery.
Keep in mind that it’s also possible to sign your email with both your domain name and your ESP’s domain name. This can give the benefits of both options.
Addressing DKIM Failure
Now the question you’ve been waiting to ask. If there is DKIM signing problem or I want to sign with my domain name, how do I do that? Here’s whom you should reach out to first:
- If you’re using an ESP, such as the GreenArrow Cloud or SendGrid, their technical support department should be able to help you.
- If you have your own email server, contact the person or organization that supports that server.
- If you prefer the DIY approach, check out our documentation on configuring DKIM. The specifics differ from one software to another, but the high-level details (create a DKIM key, post a DNS record, register for a feedback loop) are the same across most systems.
After Gmail Says You “PASS”
If you’re like most senders, once your emails are DKIM-signed, and your Gmail reports are coming up as “PASS,” you’ll quickly see the benefits DKIM provides. My guess is you’ll see a decrease in brand confusion and an increase in your recipients taking action. Plus, you’ll be able to set up Google Postmaster Tools, which we highly recommend. Run—don’t walk—to get that set up immediately!
But as we all know, verifying your identity as a sender is just the tip of the iceberg when it comes to sending emails. Be sure to check out our Resources page for dozens of other helpful articles designed to help you on your way to success. Now get out there and show the world some awesome DKIM-signed campaigns!
How To Create Lists and Import Subscribers Using GreenArrow’s API and Ruby
A minute automated is a minuted earned. Automation can be such a life-saver—after all, a minute saved is a minute…
Six Essentials for Managing Your On-Premises Email Server
My name is Jonathan Winters, Lead Support Specialist here at GreenArrow.